# 1. Log In to the Backend
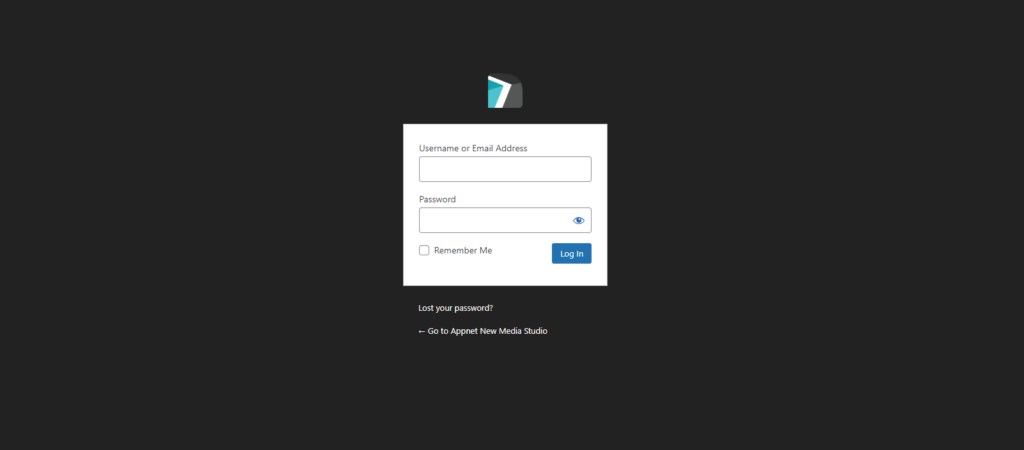
Your Appnet support representative has sent you your username and password to access your website.
In order to log in to your website, you have to go to yourdomainname.com/wp-admin
Input your username and password, then click “Log In”.
# 2. Click on the Posts Tab
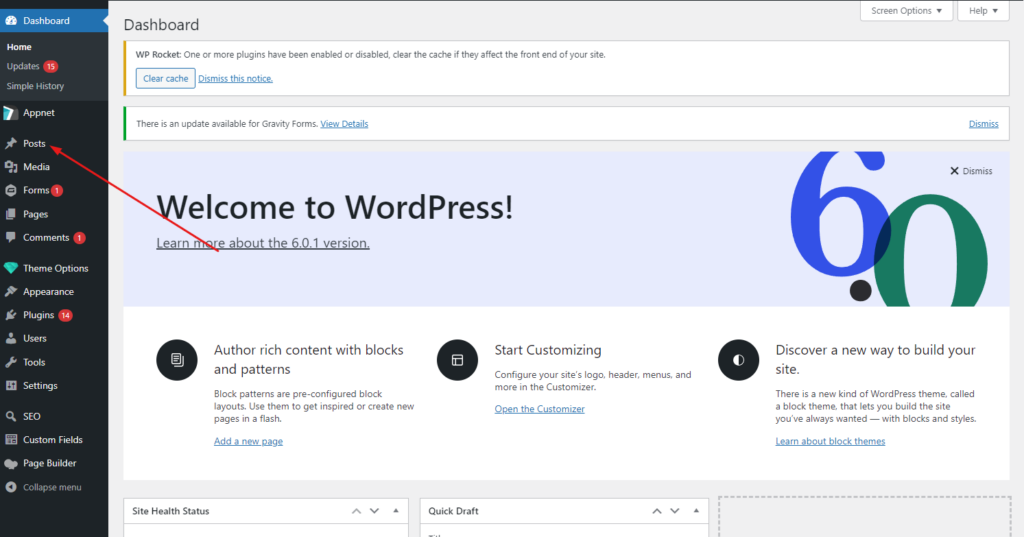
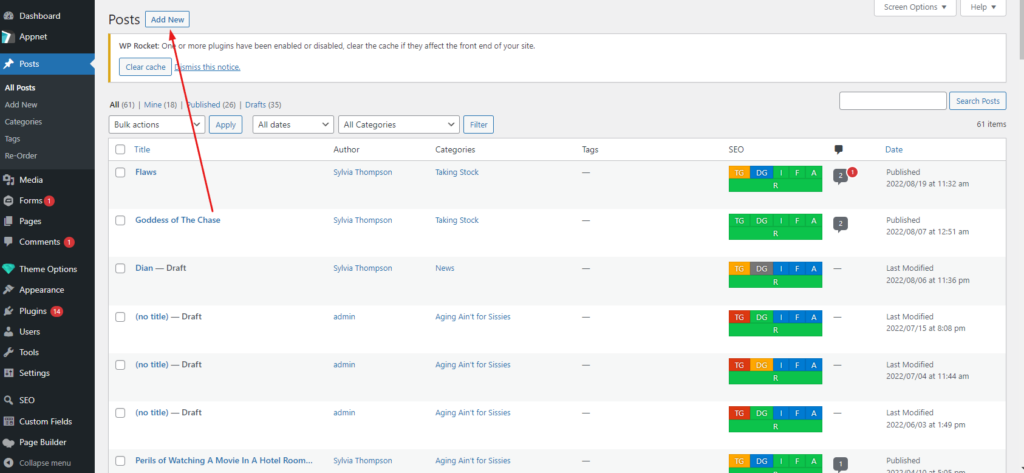
Now that you are in the backend of your website, you can see the different tabs on the left-hand side. Click on the tab named “Posts”.
# 4. Add the Title
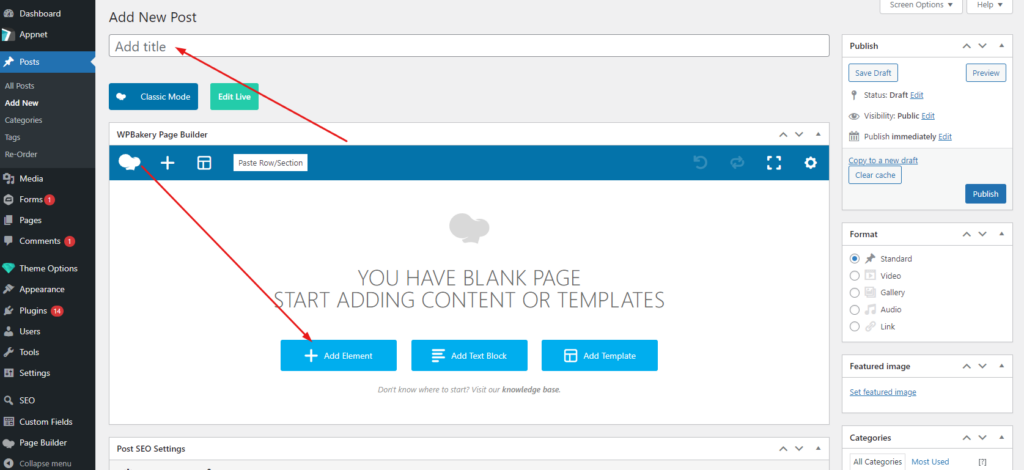
The first field on this page is the box that says “Add title”, this is where you are going to add the title of your new blog.
Once that is completed, the next box is where you should click the + button.
# 5. Add Text, a Button, and More!
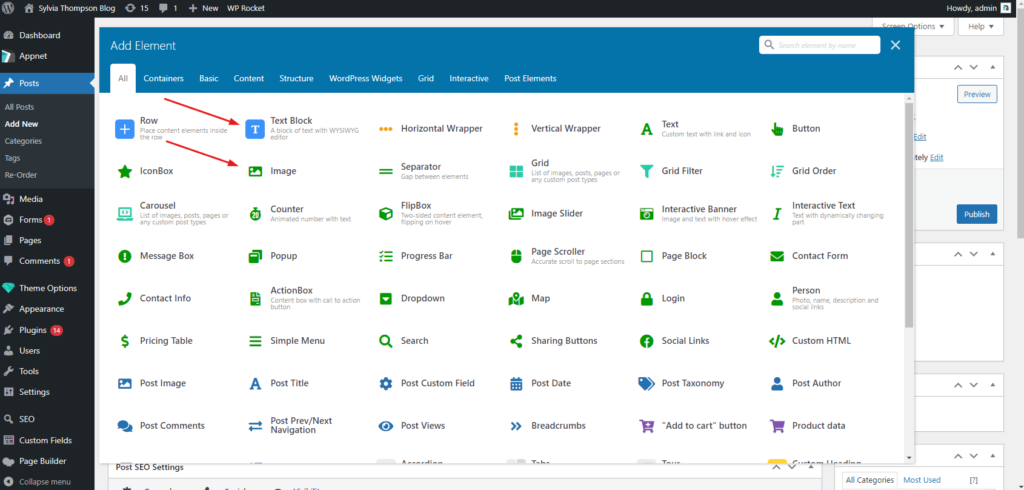
Add one element at a time. Whichever you want to show up first, you should click on first.
# 6. Add Header Text
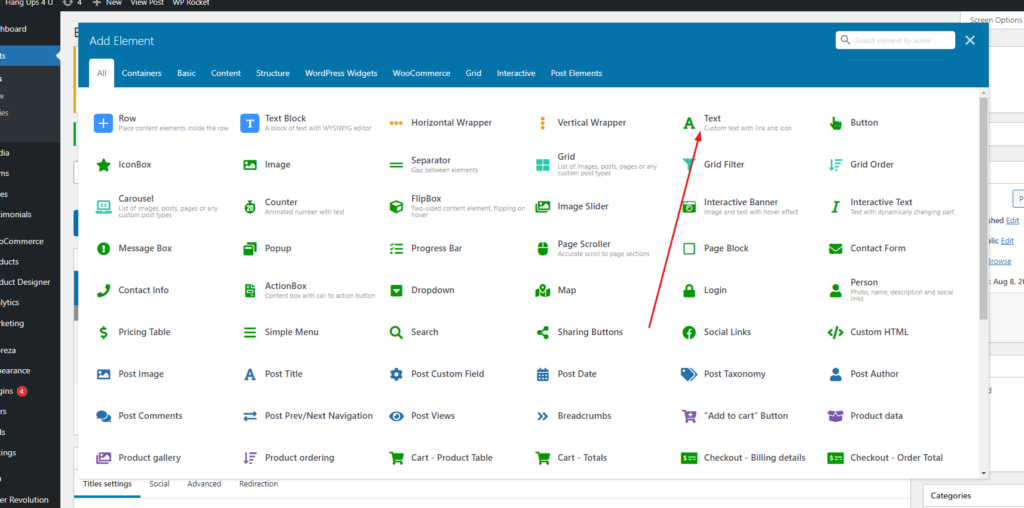
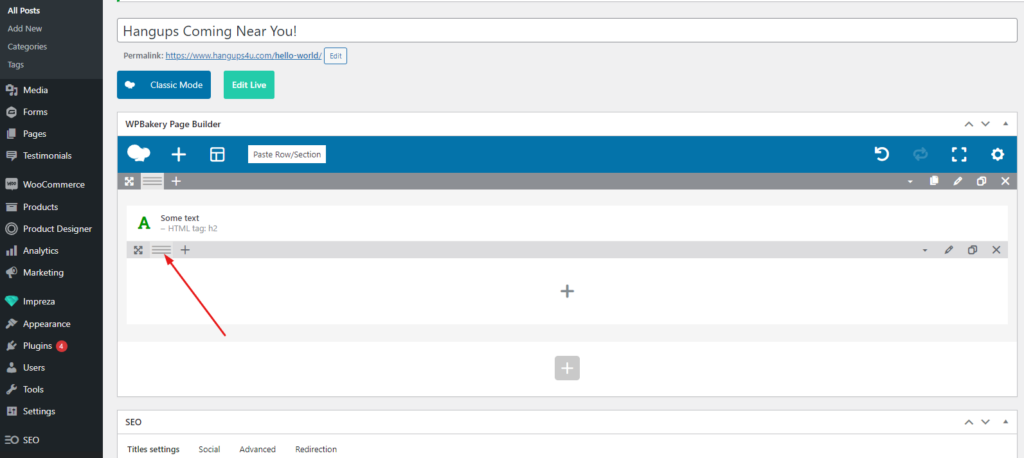
Click the option that says “Text”. Once you click it, the first field will say “Some text.” Change that text out with what you would like to be your subheading. A subheading denotes what the next section will be about. It is a way of organizing the page in an easy to read format.
You should set the HTML tag as H2 for subheadings. Heading 2’s are used to highlight important pieces of information.
Once you have completed that, click [ Save Changes ].
# 7. Adding an Inner Row
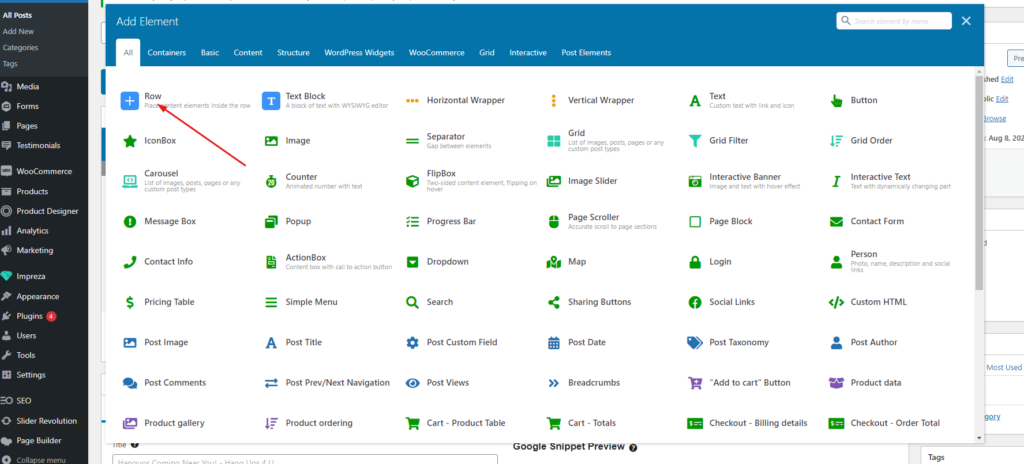
Hover your mouse over the header text, and you will see a little + button directly underneath the header text. The description will pop up that says “Prepend to this column”. Click on that, then click on row – It’s the first option in the Add Element box.
# 8. Styling the Row
Changing the row orientation setting (view picture), will allow you to set the layout for your blog. This is really handy when wanting to make your blog look excellent.
For the blog that you are currently reading, I have it on the custom setting of 3/5 + 2/5. A popular option is 1/2 + 1/2, but you can choose what works for you. You can always change this too.
# 9. Adding a Text Block
In the row that you just styled, you can choose what you want on each side. Keep in mind that your readers will read left to right, so the most important item should go on the left.
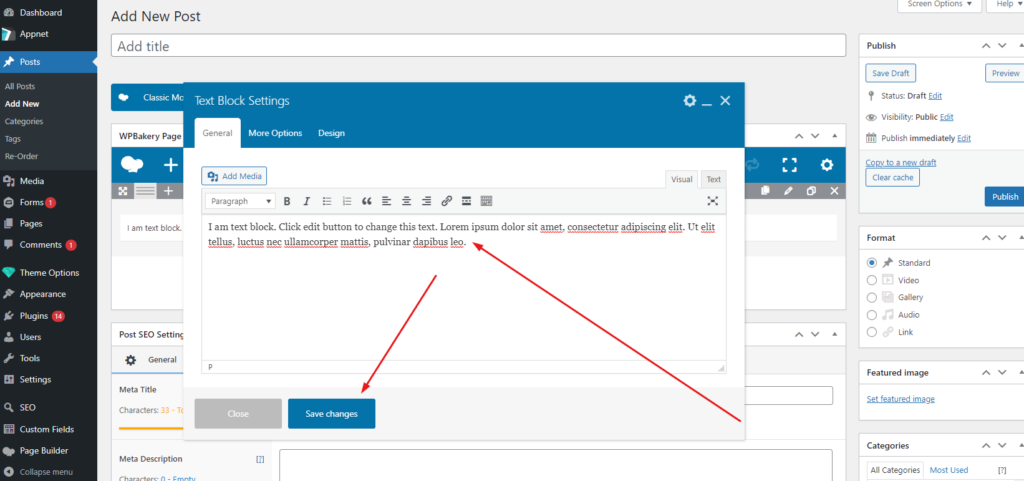
Once you click on the text block element, the Text Block Settings will pop up. In this open box, you can delete the text that is there and start typing whatever you wish. Once you are finished typing, click [Save changes].
# 10. Adding an Image
On the opposite side of the text, put the image element.
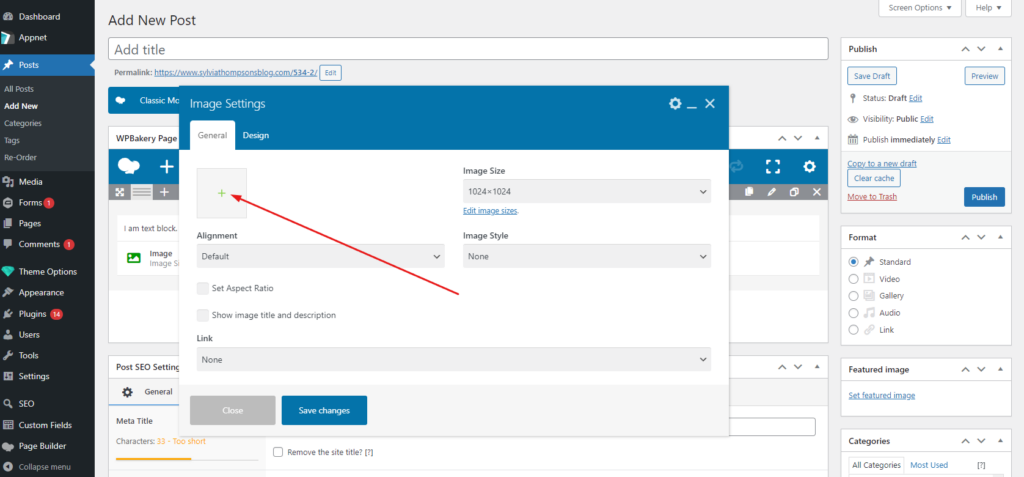
Once you click on the image element, the Image Settings will pop up. In this box, you will see a tiny square with a green +. Click on that square.
Once you click on it, the “Set Image” box will pop up. Either select the image from your available images in the gallery, or select “Upload Files” in the top left and drag and drop an image on your computer.
Then click “Set Image” on the bottom right. This will save the image and then take you back to the “Image Settings”, click the [Save Changes] button when completed.
# 11. Clone the Entire Row
The clone button – which resembles two rectangles on top of each other – will be your best friend.
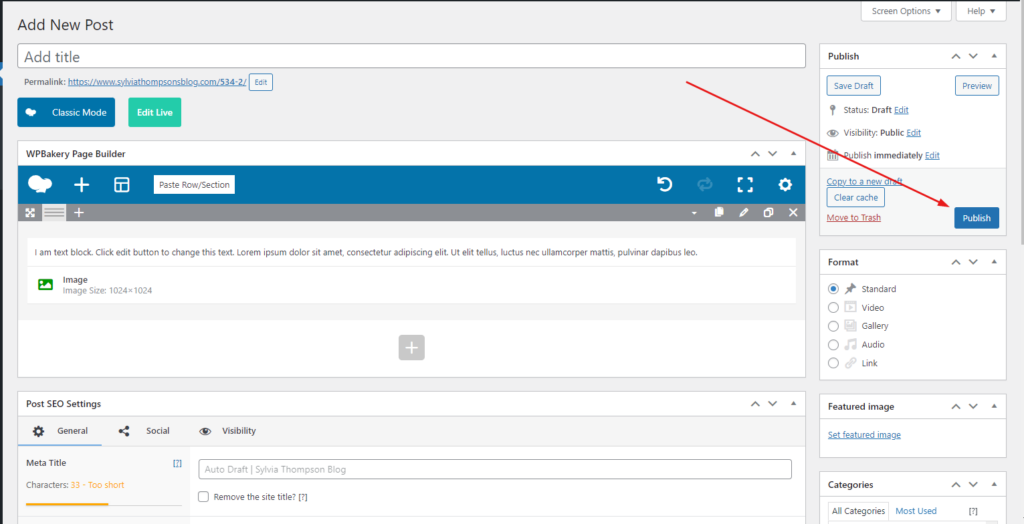
Instead of redoing everything you just did, just clone it. Once you clone it, go in and replace what is already there with your next section’s content. Continue this until you have completed your new blog.
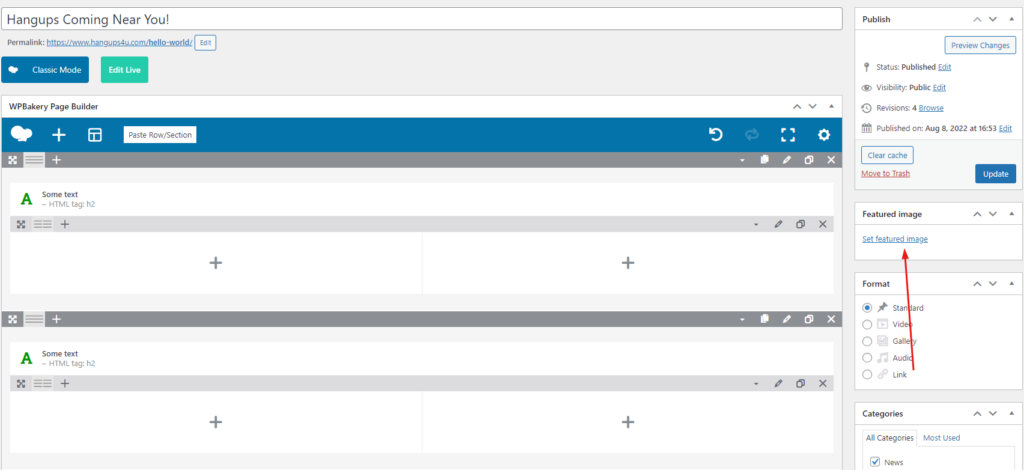
# 12. Set a Featured Image for your Post
Depending on how your designer styled your blog, the featured image may set the image for how all of your blogs appear together on the front end of your site. Make sure to select a picture that makes the most aesthetic sense for your blog.

