# 1. Log In to the Backend
Your Appnet support representative has sent you your username and password to access your website.
In order to log in to your website, you have to go to yourdomainname.com/wp-admin
Input your username and password, then click “Log In”.
# 2. Click on the Pages Tab
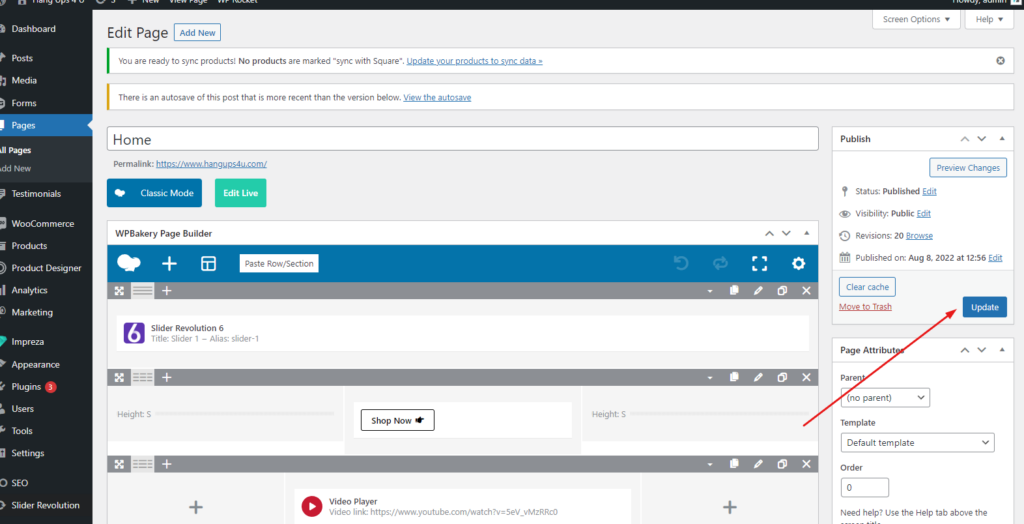
Now that you are in the backend of your website, you can see the different tabs on the left-hand side. Click on the tab named “Pages”.
Then, click on the page that you are trying to update, in this case it is called “Home”.
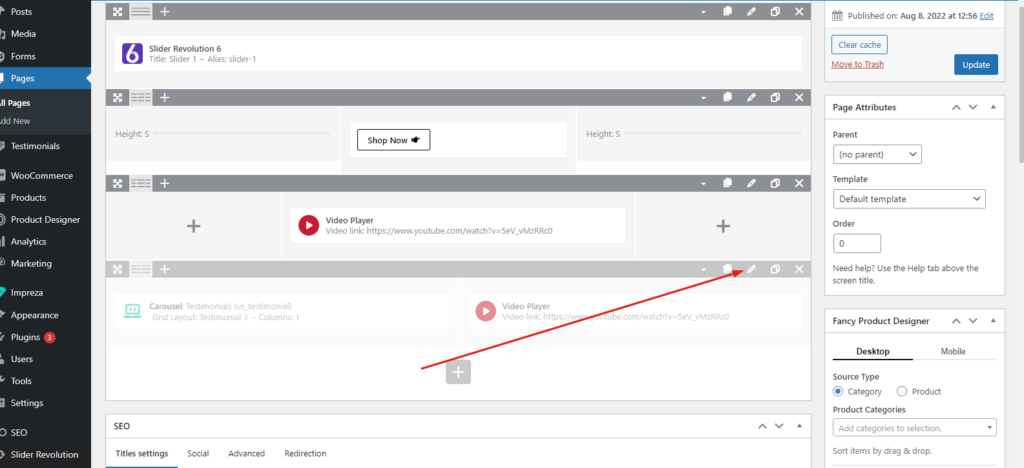
# 3. Click on the Greyed Out Row
Your site is currently not using this row, so it is greyed out. To have this row show up again, click on the pencil on the row. The pencil, in WordPress terms, allows you to edit.
A box will pop up called “Row Settings”. Grab the scroll bar within the box and slide to the very bottom of the box.
Uncheck the box that says “Disable Row”. Then click on “Save changes”.


